Broken Colour Techniques
Special Effects
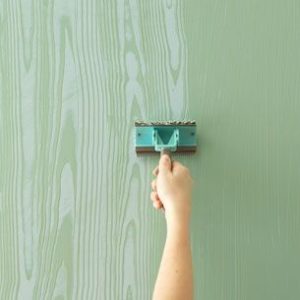
Rag Rolling.
This effect is obtained by rolling over a newly applied coat of glaze a onto a previously applied base colour with either clean rag, or polythene twisting the rolling motion to produce a marble type appearance.
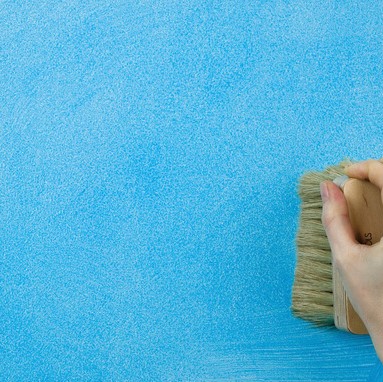
Stippling
A decorative effect achieved by applying a wet coat of glaze over a base coat colour and tapping the surface with a stippling brush.
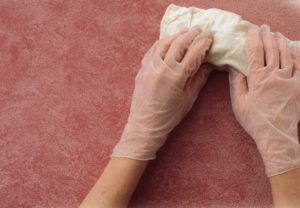
Sponging Off
This paint effect is achieved by using a slightly moist natural sea sponge which is tapped across the newly applied coat of glaze removing some of the newly applied wet glaze coat.
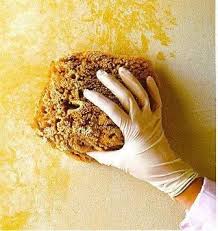
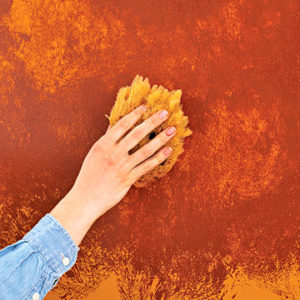
Sponging On
This design is created by using a natural sea sponge which is then dipped into the glaze then tapped over the surface turn the hand in different directions to produce the required pattern and texture.
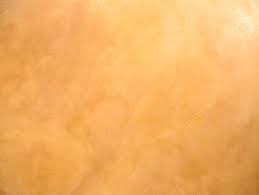
Colourwash
This mottled effect is achieved by applying a glaze coat over a coloured base coat in different directions then with a brush lightly glide over the surface to soften the appearance.
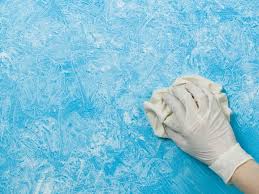
Bagging
This is effect is achieved by taking a crunched up piece of polythene to form creases and tapped onto the wet glaze coating.

Dragging
This is a paint effect is produced using a dragging brush ( as in graining) which is pressed into the wet coating of glaze to form straight lines.
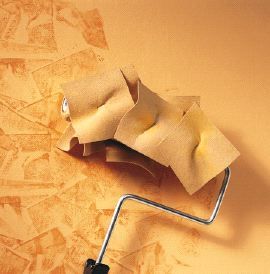
Frottage
This effect is created by taking lining paper (800 grade) crunched up then opened up and laid out and placed over
a wet coating of glaze and finely smoothed over with a brush.
Leather Roller
This type of roller is formed by taking cut pieces of chamois leather screwed into a roller sleeve. Once formed the roller is then used to run over a wet coating of glaze in various directions to produce the required pattern.
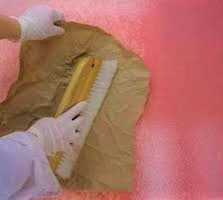
Woodgrain effect
This grain effect is produced by using a graining rocker.
See. Broken Colour Toolbox under Tools and Equipment and Specifications -Broken Colour Techniques
Blistering
Blistering
Cause
Generally blistering is caused by moisture ingress into the underlying substrate. In time this builds up behind the paint coating resulting in blisters forming and in many cases, when broken, contain water.
In other cases blisters can form in and around wood knots and these can be as a result of gases from hardwood knots and sap.
Solution
The cause of the water ingress should be determined and rectified.
Note: Where wood knots are present then these should be either cut out and replaced with sound wood or two pack wood filler and suitable primer. For hardwood surfaces a spirit based aluminium wood primer could be used.
Shellac knotting will not resolve blistering problems as it is only designed to isolate the tannic acid, preventing it coming into contact with oil based alkyd paints to preventing discolouration. (see yellowing)
Complete removal of all the existing coatings and repaint with a standard system for wood.
Flaking on Under Bound Surfaces
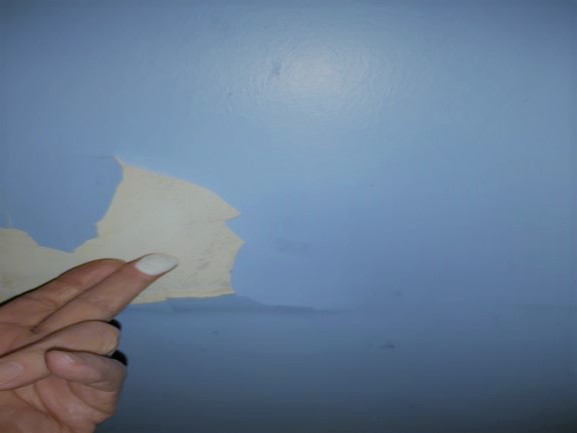
Under Bound Surfaces
Cause
Flaking is due to the underlying material being under bound Material which in case is old distemper
Solution
Complete removal of all the coating should be removed back to a sound surface.
Patch repair and painting is not advisable.
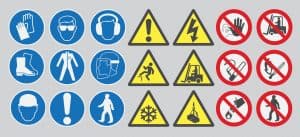
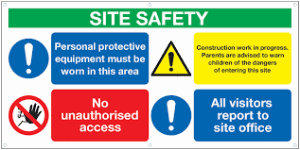
Personal Protective Equipment (PPE)
PPE (Personal Protective Equipment)
Throughout the Building and construction industries it is mandatory that all employees wear suitable PPE at all times.
The type of PPE required will depend on the functions being carried out and will be made known either
by standard site notices or specific instructions issued by the employer.
 |
 |
Health and Safety at Work Act (1974)
Health and Safety at Work Act (HASAW)
Health and Safety in the workplace is the responsibility of all irrespective of the activities being carried out.
The highest percentage of accidents is caused by trips and falls within the building and construction industry. It is of paramount importance that work areas are kept free and clear of all potential hazards.
Whenever a potential hazard is identified it should be reported immediately via your line management to ensure that any resident health and safety officer or project manager is made aware of the situation.
Contact: https://www.hse.gov.uk
Analysing Paint Problems
 Analysing Paint Problems
When problems occur on site they can normally be associated with the following elements:
Specification employed, substrate conditions, weather/ internal environment, application methods, materials usage.
In the majority of cases most problems should be relatively straight forward to resolve. However, if they cannot then it may be necessary to seek a third party involvement.
Case History.
The last applied coating had after a relative short period began to show signs of cracking and flaking. The client would not accept the decorator's opinion that he was not at fault.
Under the circumstances as a substantial monitory sum was involved both parties agreed to obtain the services of an independent consultant and both parties agreed to accept the findings and recommendations.
Site visit.
The first step was to carry out a site visit and assess the situation. At this time a visual examination of the problem was made and a sample of the defective paint film removed for examination.
Examination
When the dry paint flake was removed from surface it was brittle and the coating left on the surface was powdery/under bound in nature. (Distemper). This under bound coating was also attached to the rear of the paint flake.
The removed sample measured an overall film thickness of 708 micrometres and was recorded.
The under bound coating, firmly attached to the reverse side of the paint flake was easily removed when washed and taken back to a firm washable surface.
The film thickness was again measured and recorded as 427 micrometres resulting in 281 micrometres of the powdery material being removed.
35 micrometer is the average film thickness of modern paints. The cross section of the paint film removed shows the number of coats and the film thickness of each.
Conclusion
The problem encountered is due to the combined tensile strength and film weight of other coatings applied onto the original powdery/under bound material. The initial coat applied to the under bound surface has limited adhesion properties. Therefore this along with subsequent coatings has aged meaning that the overall tensile strength of the paint film is greater than the adhesion of the initial coat. Cracking, crazing and flaking has occurred.
Note: The difference in colour shown of the original sample taken off he wall and the other samples shown was due to the artificial lighting.
See specification/distemper.
For onsite assistance contact: [email protected]
Assessing & Dealing with Problems.
Problems do arise from time to time, “What’s gone wrong?”; “What should I do?”; “Am I going to be blamed”?; “Will I be out of pocket?”; “Will I lose a client?”.
These are all questions which can quickly run through the minds of those who encounter a problem.
It is quite easy to seek help from your product supplier and if necessary ask for the assistance of the paint manufacturer’s technical staff. They are there to help, not to apportion blame.
Today’s technology and production faculties enable manufactures to produce paint in large batch sizes of up 40,000 litres at any one time.
Quality control procedures by raw material suppliers and the manufacture ensure as far as possible, that the products manufactured are consistent. Even so they too can occasionally get it wrong.
For technical and environmental reasons, coatings have changed over the years along with the types of surfaces that require painting. These changes have made it more difficult to always get it right and it is not necessarily the problem of anyone person.
When it is necessary to call in the supplier/manufacture or an independent consultant, to save unnecessary time it is best to obtain all the relevant details relating to the issue and the following is suggested:
-
-
-
-
- Name, Address, Telephone Number.
- The best time to contact.
- Your Client’s Name and Address (with consent).
- Information relating to the product (s) used.
- Specification employed. Who issued the specification
- Interior – Exterior.
- Surface condition.
- Weather conditions.
- Temperature.
- Batch numbers of the product (s) used (always printed on containers).
- Method of application.
- Your interpretation of the problem.
-
-
-
The above will enable the supplier/manufacture to check if the actual product (s) of the same batch is/are in stock. If not, they can check the retained sample. (All manufactures retain a small sample of the product batch for 12 months or longer). It is always best to deal with matters in this way, as the supplier's/manufacture's representative will know before arriving on site if the product is at fault or not.
What is Distemper
What is Distemper
Distemper is available in three qualities, soft, hard and oil based.
Soft distemper is the most permeable for interior use and the dry film is chalky and can easily rub rub off when brushed.

Hard distemper is modified with casein (glue) to offer greater resistance to abrasion.
Oil based has been modified with oils such as raw linseed oil giving greater resistance to wetting.
Specification
General
All surfaces new or previously applied distemper should be thoroughly cleaned down by the most appropriate means to remove loose, defective material, dust, dirt, organic growths and any other contaminates to leave the surface clean and dry.
Areas affected by organic growths should be treated with a fungicidal solution in accordance with manufactures instruction.
All making good with the appropriate filler and sanded down.
Priming
Apply one coat of Clearcole primer to all new or bare areas of plaster and allowed to dry.
Painting
Apply two or more coats of Distemper in accordance with the manufactures instructions.
For further information contact: https://www.roseofjericho.co.uk Tel: 0193583676
Limewash

Limewash also known as Whitewash
Limewash should only be applied to previously applied Limewash and Lime based surfaces, new brick or stonework where a lime mortar has been used.
Specification.
Preparation of previously lime washed surface.
Remove by the most appropriate means, all loose, defective or otherwise suspect material back to a firm edge. Treat all organic growth as necessary, ensuring the surface is clean and and free from all dust, dirt and any other contaminates.
Make good all defective area with a lime based mortar and allow to dry.
All surface must be thoroughly dry, although, it is necessary to lightly wet (dampen) the surface by brush or fine spray to reduce the surface porosity immediately prior to applying limewash.
Painting
Apply each coat (normally 3-4 coats) as required allowing each coat to thoroughly dry out before applying the following coat.
Apply in accordance with selected manufactures recommendations.
Note:
Ensure the material has been thinned in accordance with manufacturers instruction.
Mix the limewash on a regular basis by hand or mechanical means
Dampen the surface prior to each coat being applied and paint small areas at any one time to keeping the wet edge open.
When applying limewash the wet film opacity appears poor but on drying out the full colour and opacity becomes apparent.
Do not apply to none lime based or none porous surfaces in low or high temperatures.
For Limewash to harden and gain strength it is necessary for it to dry out slowly therefore for the first 3-4 hours the applied material should be dampened with a mist coat of water.
Current water based paints are not compatible with Limewash
See: Limewash in Problem and Remedies also Limewash Toolbox.
For full product information on Limewash contact: https://roseofjericho.co.uk/